本篇指南将会介绍我的 Hugo 主题编写过程,并作为一个备份。太长时间不写 blog,自己都忘了。如果要细看 Go 语法部分,建议重新阅读官方文档 ,有很多自定义量。
感想
作为一个解析器,Hugo 通过 Go 的模版解析器与内部定义的规则,将扩展 Markdown 生成为 HTML。个人理解是,用 Go 语法写前处理,hook 靠修改 _default 模版和 JS、CSS。和其他 blog 框架比起来,优势就是生成速度快、结构简单,但问题是:
- 很难兼容其余的框架,也许可以把 Hugo 生成的数据作为前处理步骤🤔?
- Markdown 结构的扩展语法很复杂(尤其是想自定义解析器行为),shortcode 应对复杂功能仍是力不从心。$\LaTeX$ 设置了
passthrough之后,\仍需要转译,可能我理解上有问题? - 目前没办法在 Markdown 里写特殊方法(比如 shortcode)的注释,会直接影响界面渲染,导致炸掉。
- 可能目前从不麻烦的框架上来选,Hugo 也许是最佳选择。但无论如何,MathJax 和 Hexo 我是不会再碰了。下一个选择也许是 Next.js,自由度拉满。当然如果你对 Python 更上手,可以选择 Pelican 。
Theme 目录结构
先来一个 demo 说明:
1# ao @ azusa in ~/Desktop [12:54:13]
2$ hugo new theme demo
3Creating new theme in /Users/ao/Desktop/themes/demo
核心结构
 1(my_env)
 2# ao @ azusa in ~/Desktop [12:54:37]
 3$ tree ./themes/demo/layouts
 4./themes/demo/layouts
 5├── _default
 6│   ├── baseof.html
 7│   ├── home.html
 8│   ├── list.html
 9│   └── single.html
10└── partials
11    ├── footer.html
12    ├── head
13    │   ├── css.html
14    │   └── js.html
15    ├── head.html
16    ├── header.html
17    ├── menu.html
18    └── terms.html
19
204 directories, 11 files
layouts 下面有两个重要目录:_default 和 partials,它们规定网页的整体架构(HTML 结构)。_default 放置内置模版,这些内置模版有很多,简单规则如下:
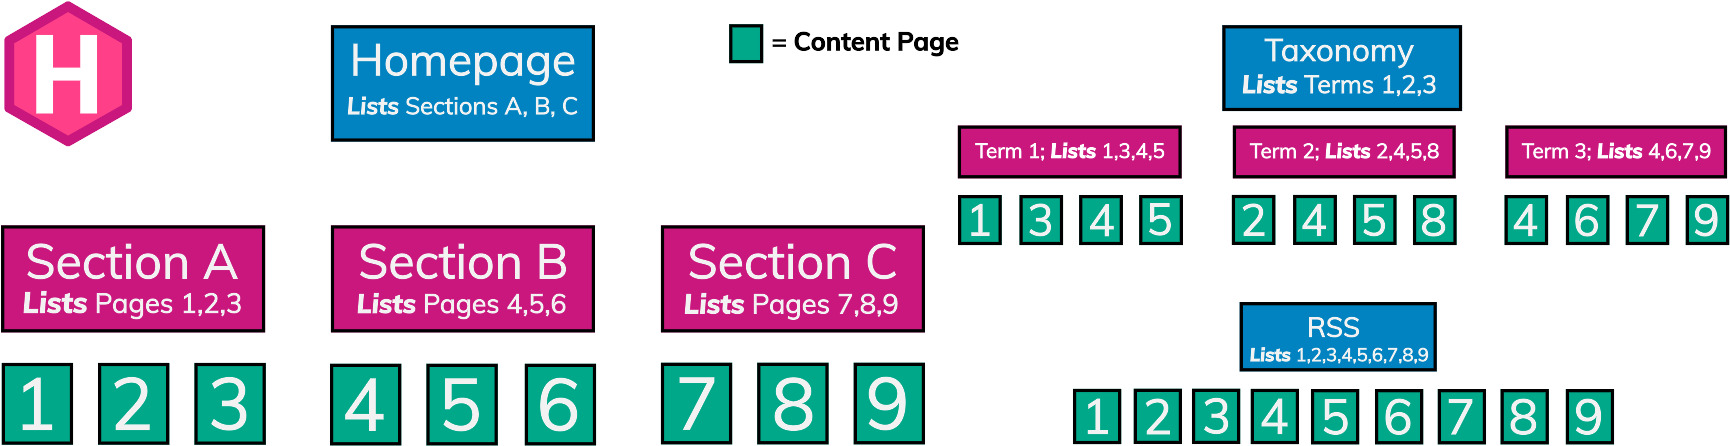
重要的是
- 开始界面:
home.html或者index.html - 每个目录下的主界面(比如
content/post文件夹的index界面):section.html - 单个文章界面:
single.html - 特性界面:
taxonomy.html或term.html比如Hugo自己生成的tag
余地很大,你每个只写一个界面就行。single.html、section.html、index.html 就够用了。
 1layouts/
 2├── _default/
 3│   ├── _markup/
 4│   │   ├── render-image.html   <-- render hook
 5│   │   └── render-link.html    <-- render hook
 6│   ├── baseof.html
 7│   ├── home.html
 8│   ├── section.html
 9│   ├── single.html
10│   ├── taxonomy.html
11│   └── term.html
12├── articles/
13│   └── card.html               <-- content view
14├── partials/
15│   ├── footer.html
16│   └── header.html
17└── shortcodes/
18    ├── audio.html
19    └── video.html
至于 partials 目录,则用于放置可快速复用的代码片段,比如 HTML 头结构。当然你也可以直接写在上面的 _default 里。
最后就是 shortcode 了。虽然可以直接在 Markdown 里手搓 HTML,但是非常麻烦。shortcode 就是把这部分写成模版,并用类似 Go 的语法读取参数。不得不说,还是挺麻烦,个人感觉某些场合可能还不如直接写 HTML。
文件存放
说完了主题文件结构,接下来简单写下文件存放与解析方式
文件结构
 1# ao @ azusa in ~/Library/Mobile Documents/com~apple~CloudDocs/MyBlog/hugo-blog/themes/pixel on git:master x [14:42:46]
 2$ ls -al
 3total 56
 4drwxr-xr-x  11 ao  staff   352 Feb  9 13:30 .
 5drwx------   4 ao  staff   128 Feb  9 13:30 ..
 6-rw-r--r--@  1 ao  staff  6148 Feb  8 20:19 .DS_Store
 7drwxr-xr-x  13 ao  staff   416 Feb  9 10:09 .git
 8-rw-r--r--   1 ao  staff  3096 Feb  8 15:53 .gitignore
 9-rwxr-xr-x   1 ao  staff  1104 Feb  8 15:53 LICENSE
10-rwxr-xr-x   1 ao  staff  1579 Feb  8 15:53 README.md
11-rw-r--r--   1 ao  staff  1640 Feb  8 15:53 README.zh-CN.md
12-rwxr-xr-x@  2 ao  staff  3358 Feb  9 10:07 hugo.yaml
13drwxr-xr-x   7 ao  staff   224 Feb  9 13:27 layouts
14drwxr-xr-x  10 ao  staff   320 Feb  9 13:30 static
Build 之后的结构
 1# 生成到tmp的public下 -D 解析 draft
 2$ hugo server -D --bind=0.0.0.0  --disableFastRender -d ~/tmp/public
 3
 4# ao @ azusa in ~/tmp/public on git:main x [14:46:57]
 5$ ll
 6total 1000
 7drwxr-xr-x  20 ao  staff   640B Feb  9 13:32 .
 8drwxr-xr-x   4 ao  staff   128B Feb  8 17:06 ..
 9-rw-r--r--   1 ao  staff   6.0K Feb  8 20:19 .DS_Store
10drwxr-xr-x  13 ao  staff   416B Feb  9 10:51 .git
11drwxr-xr-x   4 ao  staff   128B Feb  8 15:53 404
12-rw-r--r--   1 ao  staff   688B Feb  9 13:32 404.html
13drwxr-xr-x   3 ao  staff    96B Feb  9 10:09 about
14drwxr-xr-x   5 ao  staff   160B Feb  8 16:59 counter
15drwxr-xr-x   8 ao  staff   256B Feb  9 10:43 css
16-rw-r--r--   1 ao  staff   172K Feb  9 09:13 duck.ico
17-rwxr-xr-x   1 ao  staff   264K Feb  8 15:53 favicon.ico
18drwxr-xr-x   9 ao  staff   288B Feb  8 15:53 fonts
19-rw-r--r--   1 ao  staff   7.2K Feb  9 14:46 index.html
20-rw-r--r--   1 ao  staff    36K Feb  9 14:46 index.xml
21drwxr-xr-x  12 ao  staff   384B Feb  9 13:30 js
22drwxr-xr-x  10 ao  staff   320B Feb  9 13:29 media
23drwxr-xr-x  10 ao  staff   320B Feb  9 12:36 page
24drwxr-xr-x  13 ao  staff   416B Feb  9 12:36 posts
25-rw-r--r--   1 ao  staff   1.7K Feb  9 14:46 sitemap.xml
26drwxr-xr-x   9 ao  staff   288B Feb  9 10:51 tags
27
28# ao @ azusa in ~/tmp/public on git:main x [14:46:59]
29$ ll posts
30total 104
31drwxr-xr-x  13 ao  staff   416B Feb  9 12:36 .
32drwxr-xr-x  20 ao  staff   640B Feb  9 13:32 ..
33-rw-r--r--@  1 ao  staff   6.0K Feb  9 10:51 .DS_Store
34drwxr-xr-x   3 ao  staff    96B Feb  9 10:09 2025
35drwxr-xr-x   3 ao  staff    96B Feb  9 10:09 fixbug
36drwxr-xr-x   3 ao  staff    96B Feb  9 10:09 hb
37drwxr-xr-x   3 ao  staff    96B Feb  9 12:36 hugo
38-rw-r--r--   1 ao  staff   5.9K Feb  9 14:46 index.html
39-rw-r--r--   1 ao  staff    33K Feb  9 14:46 index.xml
40drwxr-xr-x   3 ao  staff    96B Feb  9 10:09 page
41drwxr-xr-x   3 ao  staff    96B Feb  9 10:09 test
42drwxr-xr-x   3 ao  staff    96B Feb  9 10:09 vps
43drwxr-xr-x 3 ao staff 96B Feb 9 10:09 win-active这里有两个特殊文件夹,static 和 assets。static 会原封不动地全部复制到构建目录的根路径;assets 和 static 基本一致,但有两个好处:只有调用了才生成,并且可以使用 Hugo 的资源处理能力操作。
两种方法因人而异,我更倾向直接全部放进 static,将 js、css、config 分别放好,src 直接根据预计生成后的地址写。
网站配置文件
个人理解,Hugo 的网站配置文件有点像程序开始时的 Define,即用于直接配置或设置参数。最新版建议写成 hugo.yaml。这里比较重要的参数有:
 1# 基本参数
 2baseURL: https://ao2233.github.io/
 3title: 帰宅部
 4theme: pixel
 5copyright: MIT License
 6
 7# taxonomies: {} # 设置你要的拓展功能 比如我不要 categories
 8# https://gohugo.io/content-management/taxonomies/
 9taxonomies:
10  tag: tags
11
12pagination:
13  pagerSize: 1 # 首页文章数
14
15# 剩余就是自定参数了 下面供参考
16params:
17  favicon: "duck.ico"
18  subtitle: さらば、すべてのエヴァンゲリオン
19  paginate: 50 # Number of posts per page
20  social:
21    - name: GitHub
22      icon: github
23      url: https://github.com/AO2233
24    - name: GitLab
25      icon: gitlab
26      url: https://gitlab.com/AO2233
代码样式配置
这些都是用来配置代码渲染样式的,或者解析器的配置
 1pygmentsstyle: native
 2pygmentscodefences: true
 3pygmentscodefencesguesssyntax: true
 4
 5# markup & code
 6markup:
 7  defaultMarkdownHandler: goldmark
 8  asciidocExt:
 9    backend: html5
10    extensions: []
11    failureLevel: fatal
12    noHeaderOrFooter: true
13    preserveTOC: false
14    safeMode: unsafe
15    sectionNumbers: false
16    trace: false
17    verbose: false
18    workingFolderCurrent: false
19    attributes: {}
20  blackFriday:
21    angledQuotes: false
22    footnoteAnchorPrefix: ""
23    footnoteReturnLinkContents: ""
24    fractions: true
25    hrefTargetBlank: false
26    latexDashes: true
27    nofollowLinks: false
28    noreferrerLinks: false
29    plainIDAnchors: true
30    skipHTML: false
31    smartDashes: true
32    smartypants: true
33    smartypantsQuotesNBSP: false
34    taskLists: true
35
36  goldmark:
37    extensions:
38      definitionList: true
39      footnote: true
40      linkify: true
41      strikethrough: true
42      table: true
43      taskList: true
44      typographer: false
45      passthrough:
46        delimiters:
47          block:
48          - - $$
49            - $$
50          inline:
51          - - $
52            - $
53        enable: true
54
55    parser:
56      autoHeadingID: true
57      autoHeadingIDType: github
58      attribute:
59        block: false
60        title: true
61    renderer:
62    #   hardWraps: false # markdown里的换行符是否被解释为换行
63        unsafe: true # 是否允许渲染html标签
64    #   xhtml: false
65
66  highlight:
67    anchorLineNos: false
68    codeFences: true
69    guessSyntax: true
70    lineNoStart: 1
71    lineNos: true
72    lineNumbersInTable: false
73    noClasses: false # 自行调整code样式
74    style: monokai
75    tabWidth: 4
76  tableOfContents:
77    endLevel: 3
78    ordered: false
79    startLevel: 2
其中比较重要的是
- $\LaTeX$的代码直接传入而设置的
passthrough,要注意在goldmark下别配错了地方 highlight noClasses设置为false,然后导出自己想要的css配置,来适配不同颜色的主题
个人觉得最麻烦的是代码渲染设置1,CSS 要改很久。dark 和 light 文件里的类名有的不一样,导致不能通过直接前后加载来覆盖。
写 Blog 的最佳实践
最影响写作兴趣的,对我而言就是,不能太麻烦。目前的解决方案
- 统一 shortcode 参数,不用纠结参数名和有哪些参数。
- 用
tmux启动 server,以隐身模式启动 Chrome(没有 cache),再用 VS Code 手搓。
所见即所得
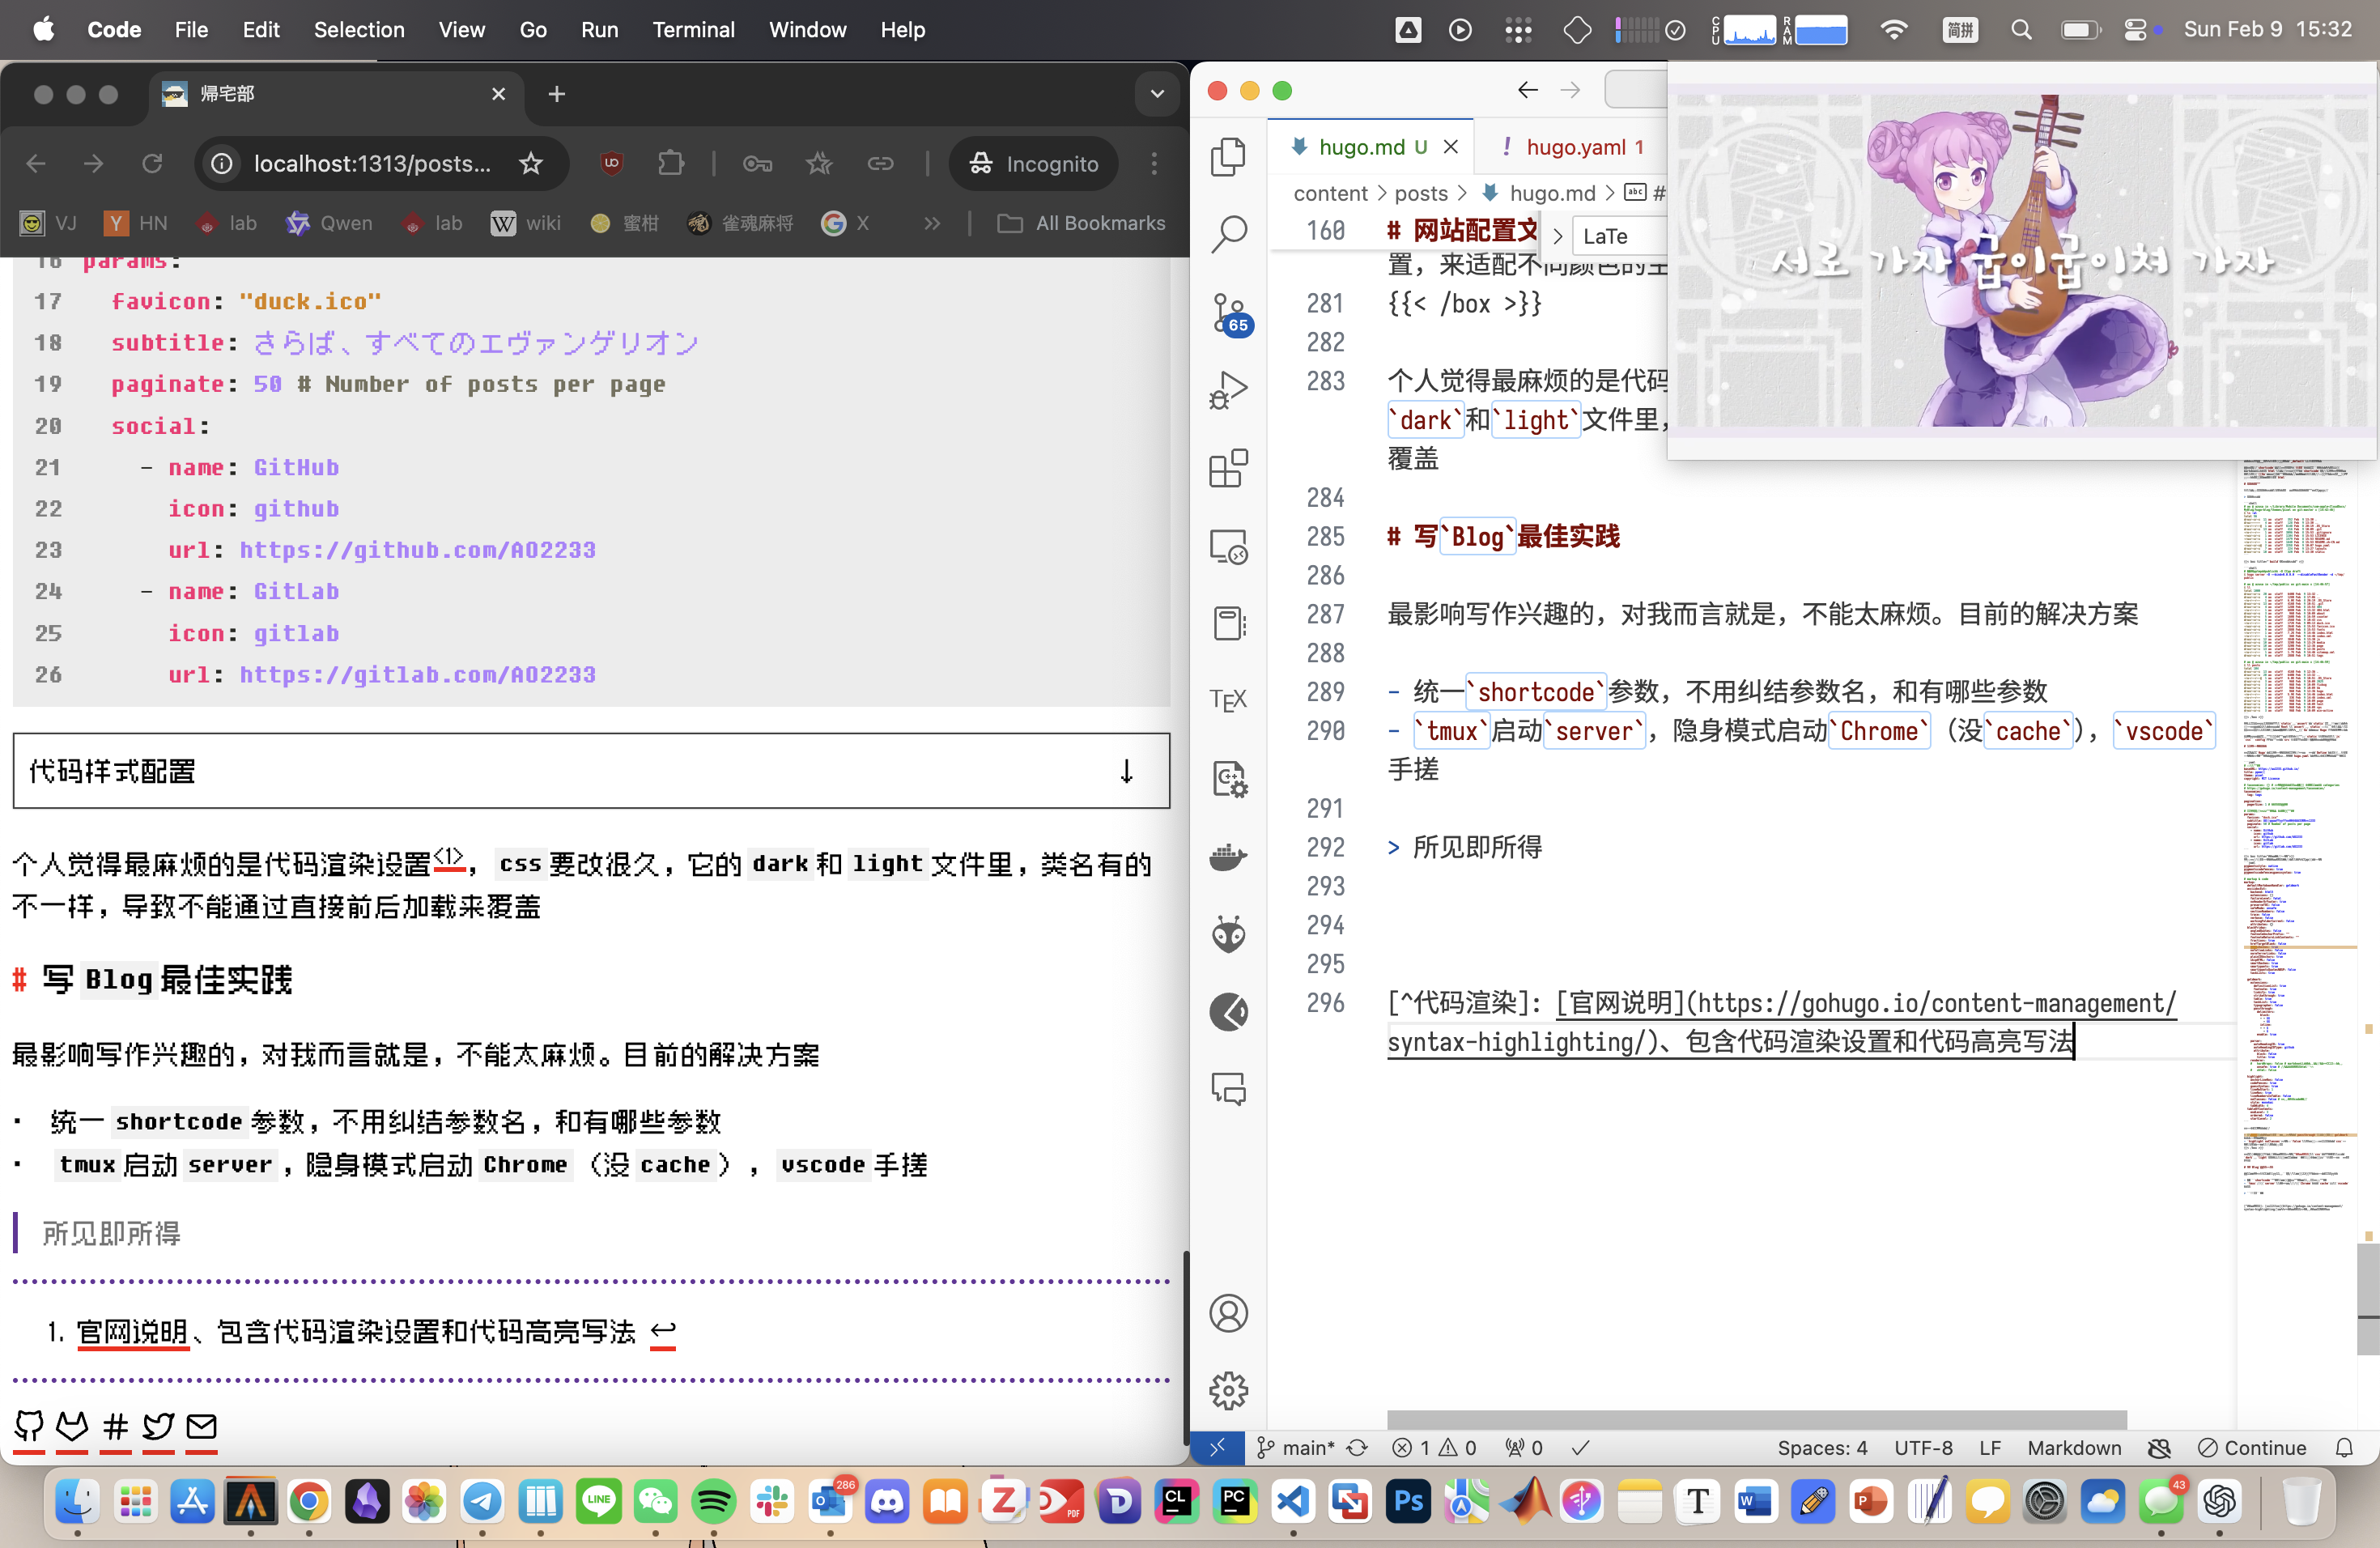
也算是半个 IDE 吧😂,接下来是给 VS Code 新写一个扩展版 Markdown 解析器。不能折叠可太无语了。
另外,就是最头痛的 shortcode,参数太复杂。
Shortcode 代码参数
 1aplayer(name, artist="", url, cover="", autoplay=true, lrc="no lrc")
 2dplayer(id, url)
 3
 4bilibili(p1) # av-id
 5box(title){content} /box
 6callout{content} /callout
 7mermaid{content} /mermaid
 8spotify(url) # link
 9date
10video(src, width="auto")
11img(src -> list, width="auto", caption="")
12
13# 这个库很奇怪,必须预设置高度,否则默认值很小,预设 heigth=70em
14pdf(id, src) # 注意这里id不能是纯数字
至此,博客搭建完毕。至于域名、多语言、站点配置,那就是后话了。已经佛系,直接套 GitHub Pages 就完事了。关于 GitHub Pages,记得两件事:
- 404界面需要加一个识别头
1---
2permalink: /404.html
3---- 如果要自动挂域名,加一个
CNAME文件;不用自定义域名时记得删除。
此网站所用主题 -> 自制主题 pixel 。下回、主题测试!